Getting pseudo-random with Minecraft Villagers
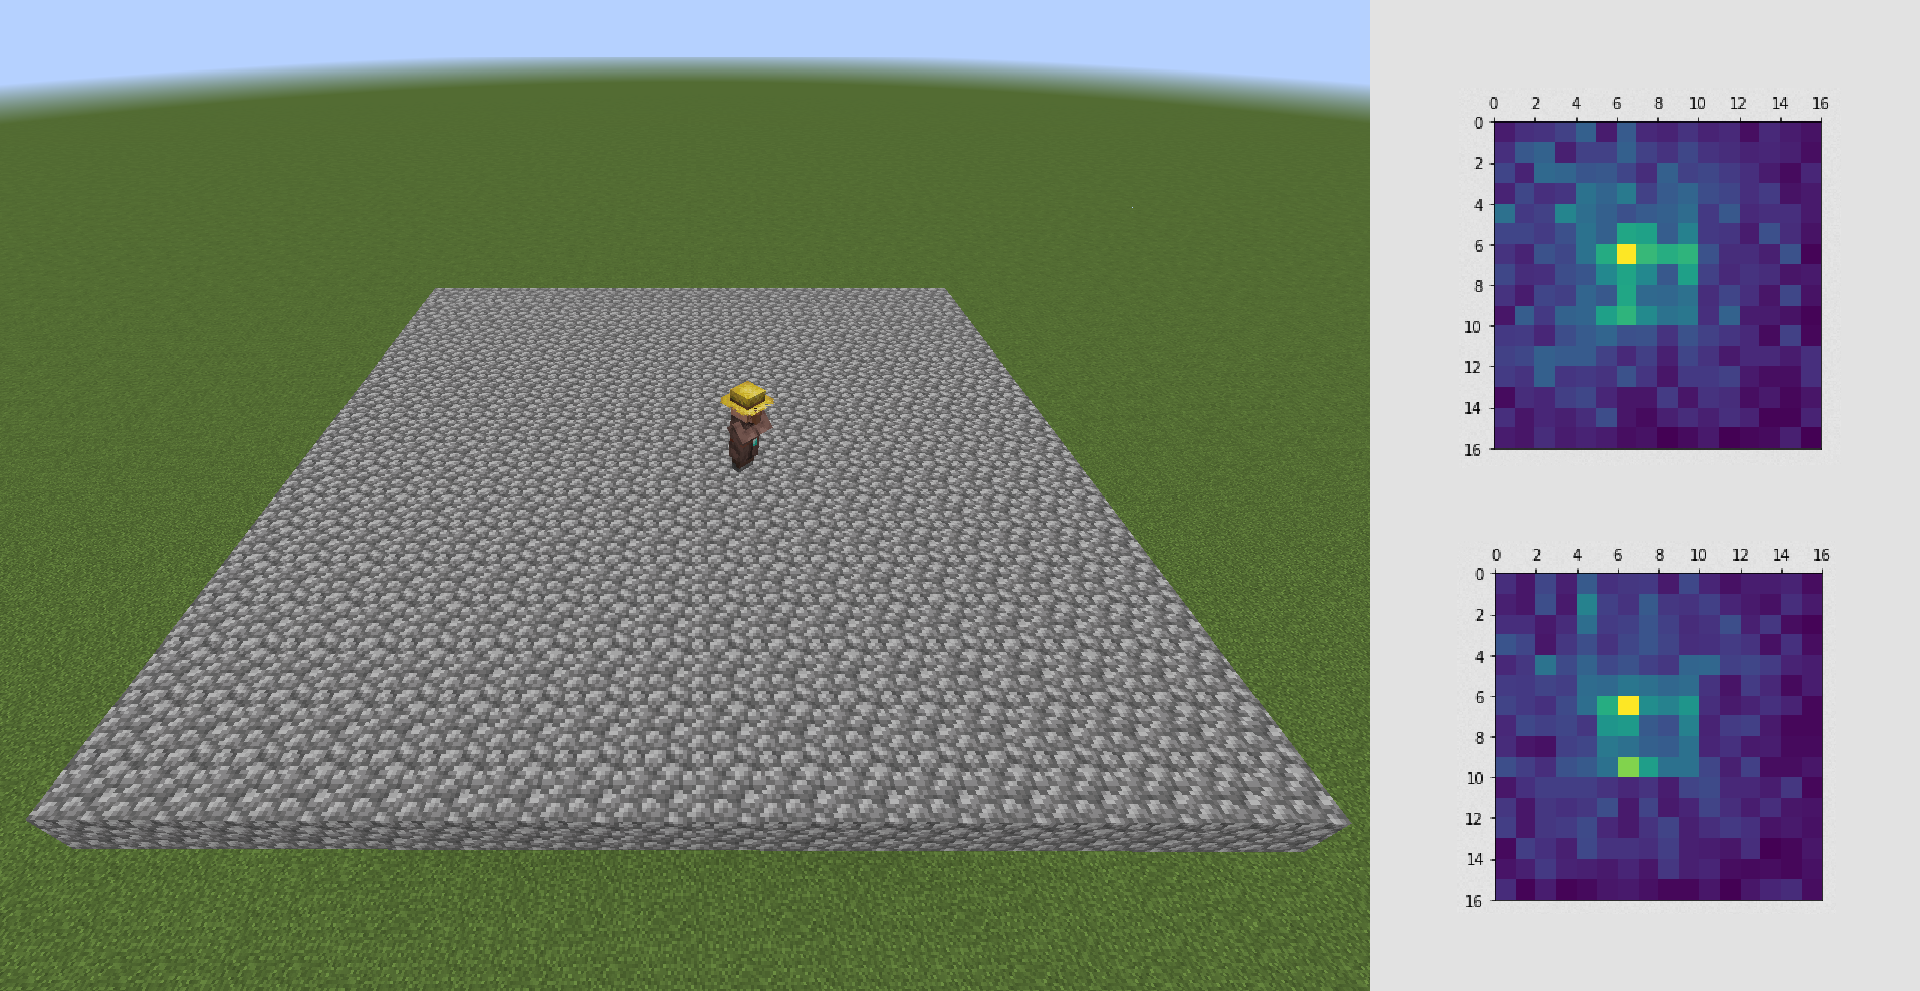
Table of Contents
TL;DR
I created an RNG which uses real-time Minecraft villager position as the seed and I don’t regret a single thing about it.
Random vs Chaotic
Some time ago I’ve had a very odd fascination with the concept of randomness and how it’s impossible to achieve true randomness digitally. In most cases it’s not necessary to have something truly random in our software, but there are cases when the impredictability of the result is paramount. Cloudflare, for example, got really creative with how they approached the issue, and have a wall in their office filled entirely with lava lamps (they wrote a pretty good article explaining the how and why).

The reason the trick with lava lamps works is not because they provide some magic solution to randomness, but rather they’re inherently chaotic. While it’s not impossible to predict what the state of the blob in the lava lamp will be, it’s incredibly difficult and practically impossible since you would have to know the exact state of every molecule/atom in the lamp, how it interacts with other molecules and so on. The same applies to waves in the ocean, air currents and many other phenomena.
One example which illustrates this very well is a double pendulum. Its trajectory is very sensitive to initial conditions and even the slightest change will result in a completely different trajectory. You could add even more joints and the result would be even more chaotic.
So once you are able to capture the state of your pendulum or your lava lamp, you can analyze it and create a unique set of numbers representing the state of your chaotic contraption. This set of numbers could be absolutely anything: last 10 captured positions of the pendulum, or a parsed picture of the lava lamp - you can go crazy with it as long as it actually represents the state.
Pseudo-randomness
Yeah, and computers aren’t able to achieve neither random nor a chaotic result by themselves - they’re designed to be completely predictable. But since we often do need numbers or strings resembling randomness, some people far more clever than I am came up with the idea of pseudo-randomness. Similar to a double pendulum, the initial conditions of a random number generator will result in a completely different set of generated numbers (as expected).
If you want to generate a random number in a low-level language like C, you need to initialize the generator with something called a seed, which in this case are the initial conditions.
#include <time.h>
#include <stdlib.h>

srand(time(NULL));
int r = rand();
Here time(NULL) returns the amount of seconds passed since the Epoch (1st of January 1970, 00:00:00) and srand() initializes the RNG. So every time you run this code and time(NULL) returns a different value, each rand() call will return a pseudo-random value, hopefully unique to that run. Keep in mind, that if you were to initialize the RNG with a constant number, say 42, the results will be the same every time you run the app. The following code:
#include <time.h>
#include <stdlib.h>

int main()
{
  int seed = 42;
  srand(seed);

  for(int i = 0; i < 10; i++) {
    int pseudoRandomNumber = rand();
    printf("%d\n", pseudoRandomNumber);
  }

  return 0;
}
gave this output (and every time you run it, you should have the exact same):
71876166
708592740
1483128881
907283241
442951012
537146758
1366999021
1854614940
647800535
53523743
Higher-level languages like Python, JavaScript or C# use the system- (time-based) or user-provided seed to initialize the RNG. However, nothing stops you, or programmers in general, to use a combination of other factors like:
- CPU temperature
- CPU uptime
- battery level or power supply voltage
just to name a few. And I am more than sure there are libraries and implementations doing exactly that.
The Idea
So now forget everything useful we’ve said so far and imagine the worst way to seed an RNG. That’s right - Minecraft Villagers.
As far as I’m aware, all mobs in Minecraft use the same RNG to figure out their movement patterns (they call it an AI on their wiki) and while not entirely pseudo-random in certain environments (this depends on the blocks they walk on, interactions with other villagers or weather phenomena), we can make them to be as pseudo-random as possible. That would entail removing all factors which may cause the villagers to stop wandering aimlessly (we want that), or prefer to stand on a certain block, or get startled, or anything similar.
So I devised a plan to put a villager on a 16x16 platform and simply let them walk around, while I would capture their position every couple seconds to generate the seed.
Implementation
As I’m not very comfortable in Java and would gladly not touch Java code, I started to look around online for a Minecraft Server Docker image. To my surprise there were quite a lot to choose from and I settled on itzg/minecraft-server with PaperMC as it seems to be the lightest and I didn’t need any fancy features or whatnot. MC servers (many other games implement this protocol) have this really cool functionality called RCON which is a TCP-based connection allowing you to run Minecraft commands as the server, so you don’t need a Minecraft client to do so.
After setting up and configuring the server (setting peaceful mode to true and so on), I got to writing the juicy part.
I created a Node.js HTTP server with Express and connected to the MC server using rcon-srcds library. Then I ran a couple commands to create the platform for the villager to walk on, spawn the villager in the middle and a helper function to retrieve the location of the villager.
I left it running for some time and when I came back I realized that I’ve made a grave mistake, because the moment I logged out of the server, the villager stopped moving and rightfully so. Minecraft Servers optimize so that mobs don’t move when they are not being rendered and they are only rendered when there’s a user nearby.
So I started looking around again and found a really cool project called PrismarineJS and their repo mineflayer. Mineflayer is a JS library which allows you to spawn bots, and for my purposes I only needed the bots to stand near a villager, so the villager’s “AI” activates. I knew that the villager can’t be allowed to see the bot, since it would cause the villager to walk near it and that defeats the whole purpose of the project.
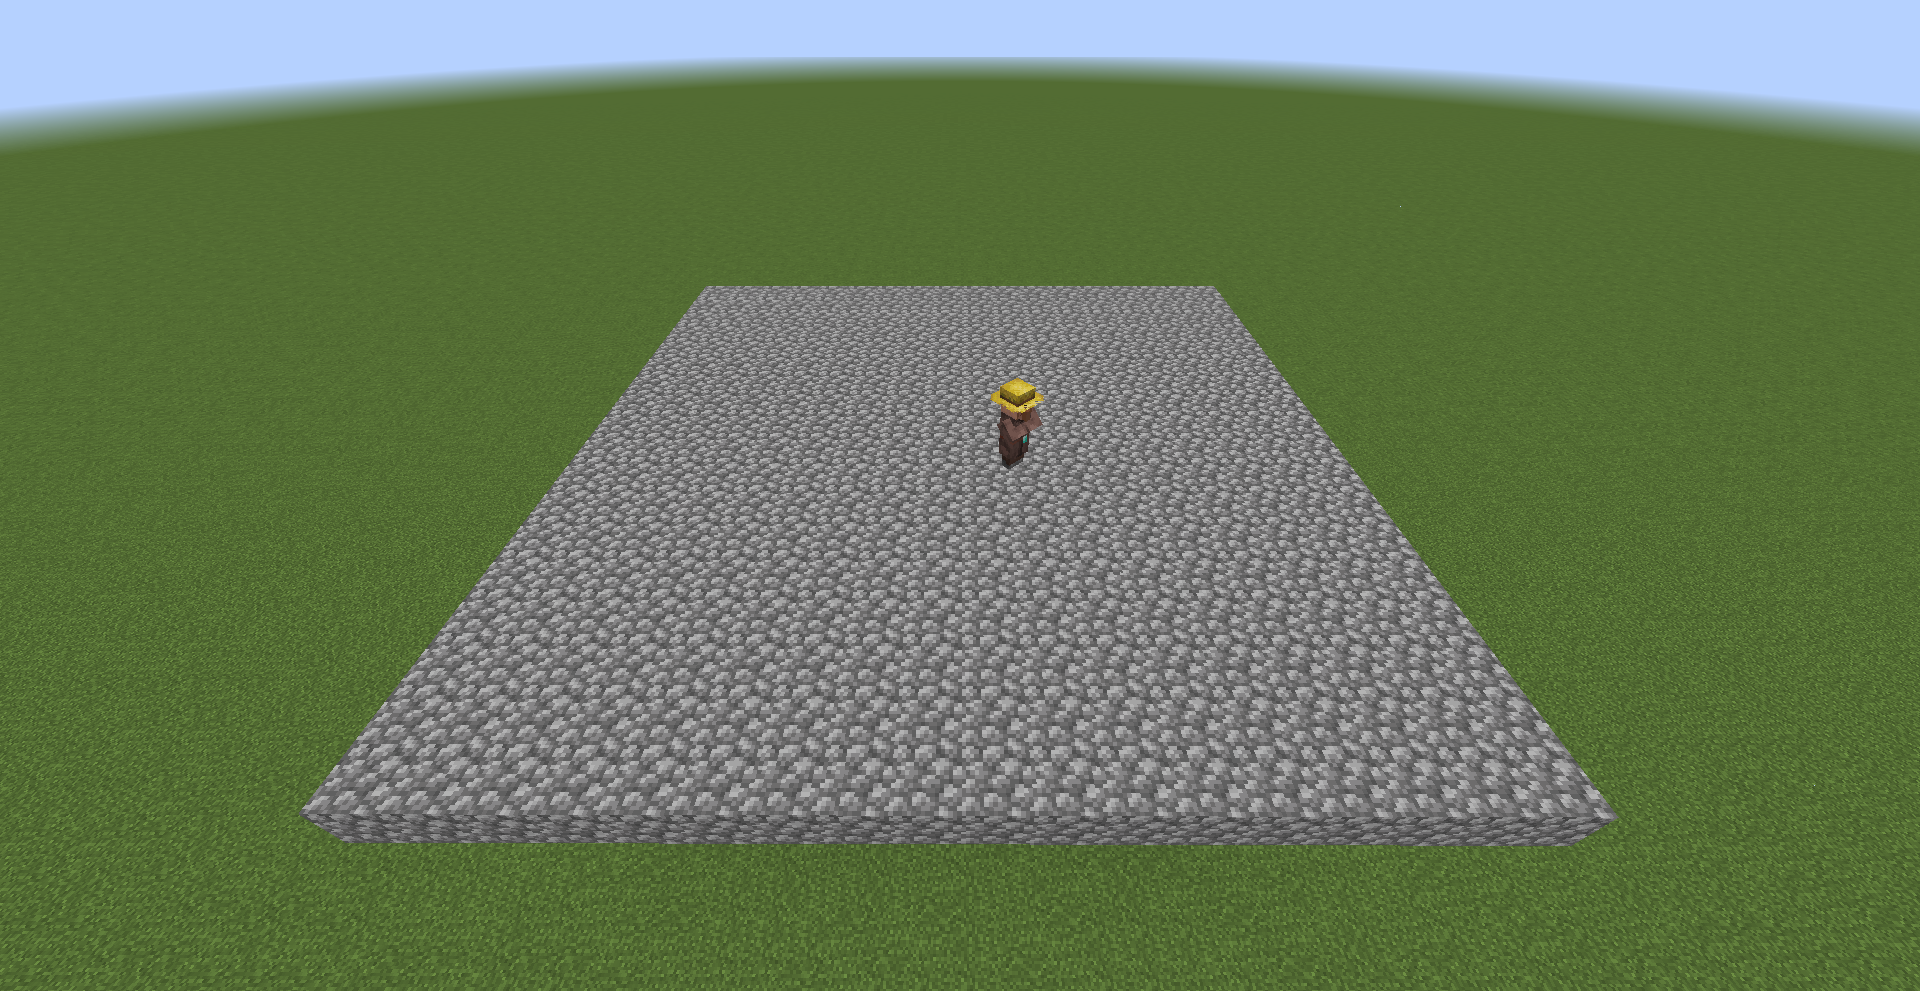
The villager platform looked like this:
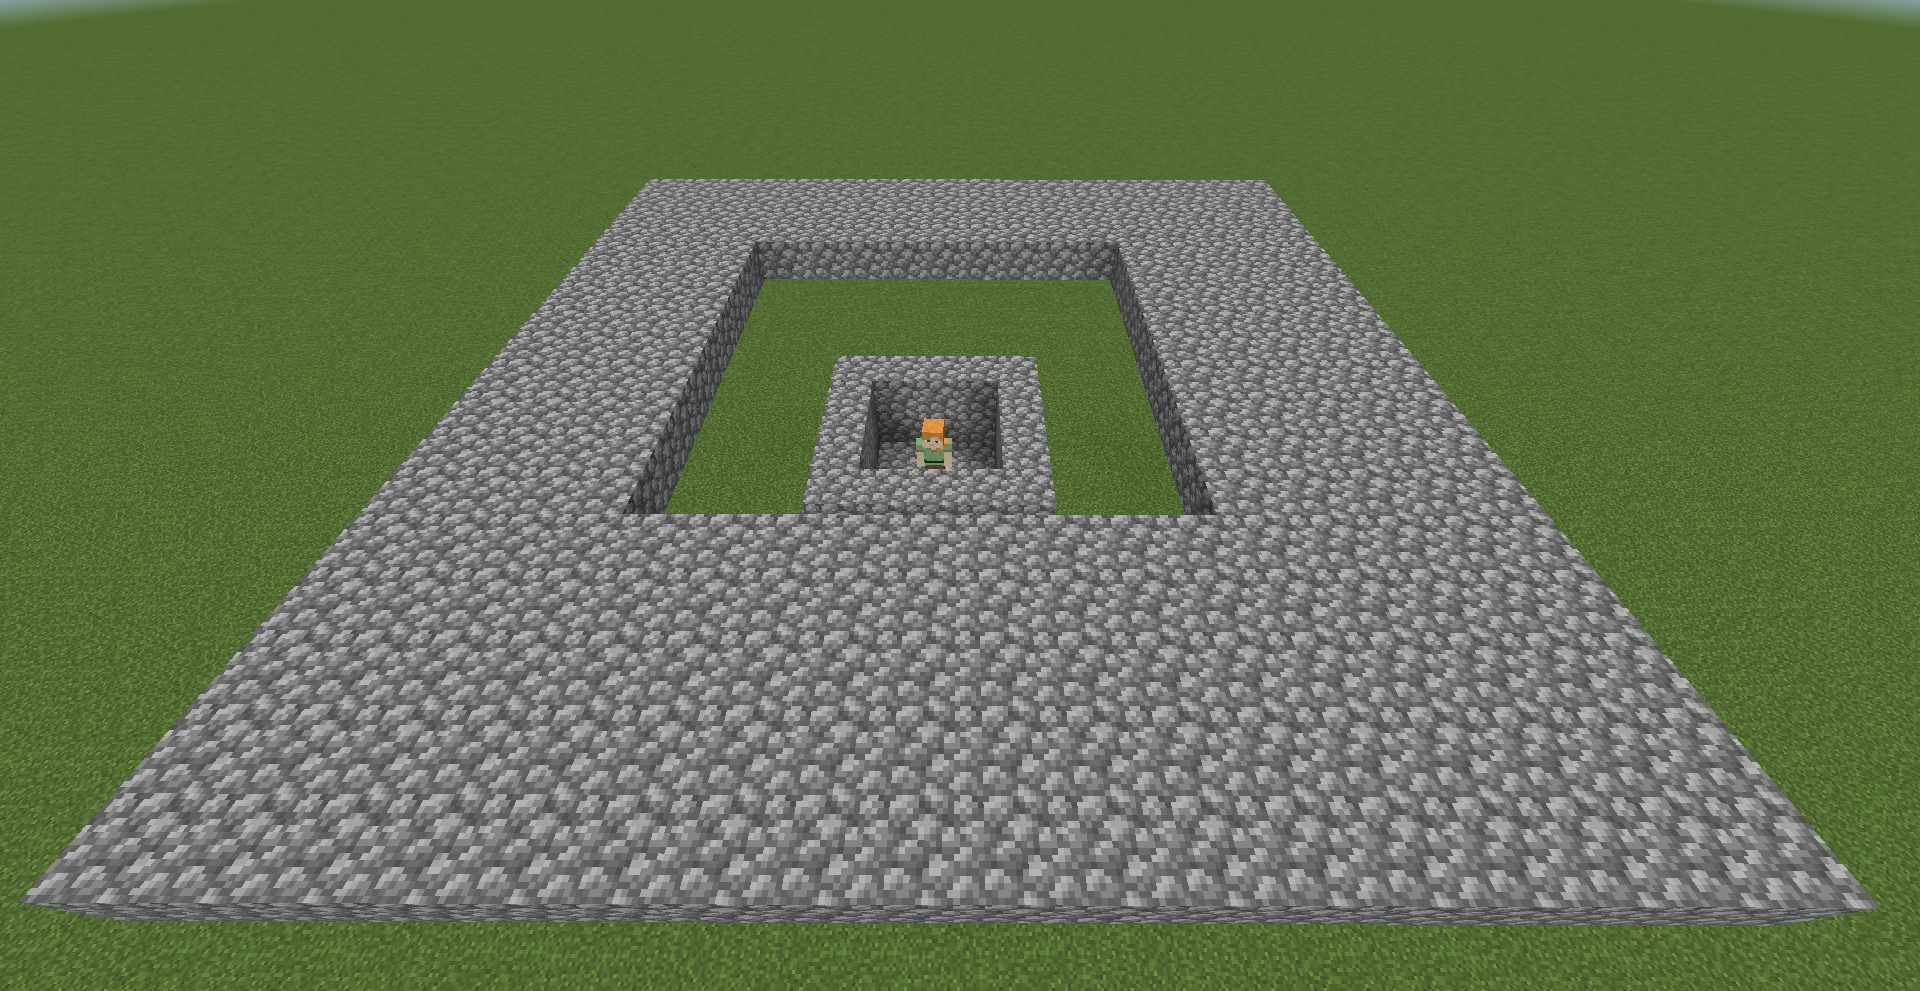
And here’s what the bot cage looked like underneath the platform (I know it’s off-center, but there’s not really a way to have a 5x5 cage be exactly in the middle of a 16x16 square):
I ended up repeating the same process 4 times to have a larger number of samples. All platforms, and by extension bots, were about 112 blocks apart (128 - 16), to exclude the possibility of villagers interacting with each other. I gave about 15 seconds for each bot to initialize and teleport to their corresponding cage and created a /status endpoint in my Express app to make sure everything went smoothly. This is the output of that endpoint once the server booted up properly and all the bots were online:
{
  "rcon": true,
  "bots": [
    true,
    true,
    true,
    true
  ]
}
Then I added two more endpoints to retrieve the captured position (note it’s X and Z, not X and Y - these are the axes Minecraft uses and I wanted to stay true to the source):
/data/position- displaying the current position of the villagers rounded to an integer[ { "x": 1, "z": 12 }, { "x": 7, "z": 0 }, { "x": 5, "z": 6 }, { "x": 8, "z": 9 } ]/data/position/disable-rounding[ { "x": 3.786772086891869, "z": 1.786854023799945 }, { "x": 6.793404662864049, "z": 7.537081867306799 }, { "x": 14.230761387590007, "z": -0.4467043443531151 }, { "x": 5.539189027425948, "z": 10.72289854076371 } ]
Sexy Graphs
Having this more or less real-time data, I was able to write a simple Python script to ping these endpoints 5000 times every 7.5 seconds, which equates to roughly 14 hours of data. In case you want to take a look at that data yourself, here it is:
The files containing position data are all valid CSV files with the following structure:
TIMESTAMP,VILL-1-X,VILL-1-Z,VILL-2-X,VILL-2-Z,VILL-3-X,VILL-3-Z,VILL-4-X,VILL-4-Z
We’ll take a look at seed.csv in just a second.
I used numpy and matplotlib to process and graph the results, and while I know it’s not much, those graphs look really freaking good, right?
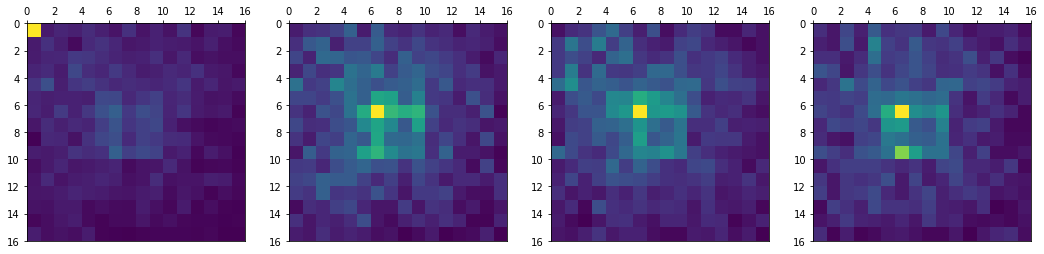
It appears the first villager has spent the most time on block (X: 0, Z: 0), and truth be told I have no idea why, but after spending 14 hours on collecting the data I just couldn’t be bothered to debug it and tweak yet another variable, especially since villagers 2-4 provided me with some pretty solid data.
While the graphs are amazing they’re not really what we came here for, so let’s see how we can extract that seed we mentioned earlier. The fact that the platform was 16 by 16 blocks is no coincidence. While there are many ways (better ways) to utilize this data as seed, I chose to represent the position of each villager hexadecimally, meaning both X and Z axes are mapped to a single digit from 0 to F. For those puzzled why I just called F a digit - hexadecimal numbering system simply means that instead of having 10 as a base number (as we do in decimal), we have 16. So instead of the usual 0, 1, 2, 3, 4, 5, 6, 7, 8, 9, we count further to A=10, B=11, C=12, D=13, E=14, F=15.
Back to the seed: since both X and Z coordinates can be represented by a single digit, we can denote the position of a villager by writing X and Z next to each other, e.g. villager on position (X: 7, Z: 13) would become 7D. A keen eye might notice this is just a single byte with a maximum value of 0xFF (255).
Since it’s much easier to work with text values in JavaScript and JSON, I decided to store this data as strings and not bytes, and if you visited the /data/seed endpoint, you would be presented with an array of the last 32 positions denoted as mentioned above. Example output:
[
  "24", "49", "65", "5C", "14", "A8", "39", "6C",
  "14", "A8", "5C", "EB", "76", "A8", "AE", "A9",
  "68", "A9", "BF", "A9", "6C", "7B", "42", "4D",
  "68", "2F", "42", "48", "A5", "59", "A5", "50"
]
The seed.csv file contains all of those entries in a format very similar to the position-related files - TIMESTAMP,[COMMA SEPARATED SEED].
Feeding the RNG
All that’s left to do now is feed the seed we retrieved to an RNG. I chose to do that in Python since it makes it very easy to work on byte values.
import random

seed = [
    "24", "49", "65", "5C", "14", "A8", "39", "6C",
    "14", "A8", "5C", "EB", "76", "A8", "AE", "A9",
    "68", "A9", "BF", "A9", "6C", "7B", "42", "4D",
    "68", "2F", "42", "48", "A5", "59", "A5", "50"
]
seed_joined = "".join(seed) # this line joins all the strings in the array
                            # above to produce a single continuous string.
                            # here: 2449...A550
seed_as_byte_array = bytearray.fromhex(seed_joined) # convert to a bytearray

random.seed(seed_as_byte_array) # here the magic happens

for i in range(10):
    number = random.randint(0, 1023)
    print(number)
As you can see it’s not special by any means, we simply pass the seed to the RNG and once we run this code we get the following output:
252
283
493
819
818
76
566
626
913
959
Why?
Alright, so we know it works, but why would you spend time coding that? - I hear you ask. The answer is very simple: for fun. Perhaps it’s not the most useful or practical piece of code, but I’ve sure learned a lot of things along the way. The reason I even started this project was because I wanted to get some hands-on experience with Docker and Docker Compose which this project heavily uses.
If anything in this post tickled your fancy, you might want to take a look at the repo and in case you would like to use this solution in a serious project here’s a guide.
No, but really, don’t ever use it in production, this was done purely for fun and education, and absolutely nothing else.
However, if you feel like trying out this project yourself, feel free to clone the repo and run docker compose up. Before you do that though, you might want to change the default ports mapping from 80:80 to something a bit more unique on your machine, like 4000:80. The Minecraft server is exposed on 25565 by default, but you can of course change it to whatever you like or even remove that line entirely to keep it inside the Docker network.
If you actually got that far and enjoyed the read, please let me know what you think! You can reach me by e-mail at adam.pisula@outlook.com.
Thanks!